
How to Beat iOS14/15 by Sending Purchase Data from Shopify Directly into Facebook
If you run a DTC Shopify store, you may have noticed a decrease in conversion data since the iOS14 updates. This is because Apple has made changes to their operating system that have caused Facebook's pixel to lose the ability to track purchase data. Luckily, there is a workaround! (Spoiler alert: it involves using Zapier.) In this post, we will show you how to send purchase data directly from Shopify into Facebook using the Offline Conversions API. With this workaround, you will be able to keep incremental conversion data that would otherwise be lost! At the end, we'll show how one of our clients saw a 40% reduction in overall CPA (cost-per-acquisition) over a 7 day time period by implementing this.
Our founder created this step by step video tutorial which you can watch below:

Things you'll need before you get started:
A Zapier account with the starter plan or higher (This workaround will use Shopify as the trigger which is a premium app available only on paid plans).
Admin access to your Facebook ads manager with the ability to manage data sources in the Events Manager.
Your Facebook pixel installed on your site tracking purchase conversions.
10-15 minutes of time to set up the integration.
Now, let's get started!
Step 1: Setting up a new offline data source in Facebook
First, you will want to create a new offline data source in Events Manager. Here is how:
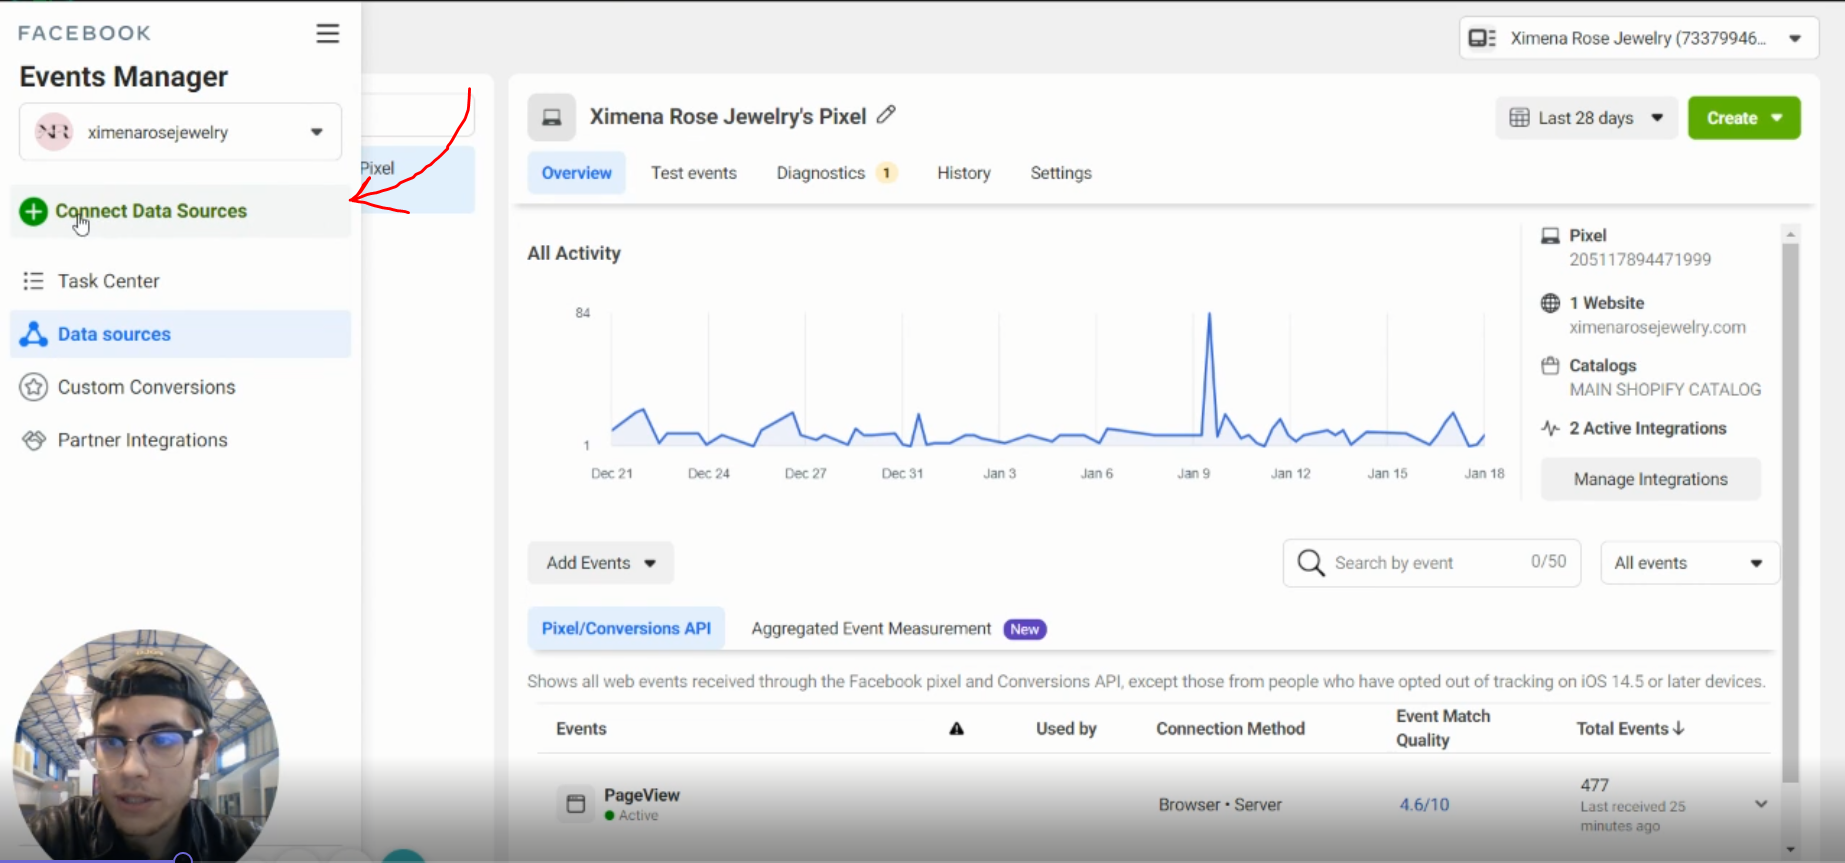
Click on events manager and choose "Connect Data Sources".
Next, select "Offline" and click "Connect".
You'll then be prompted to give your data source a name and description. Follow the prompts to complete the setup.

From here, you'll want to copy or write down the ID of the new offline data source you created as it should now appear in your list of data sources.

After this, you're done with Facebook! From here, we'll move on to setting up the Zap in Zapier.
Step 2: Set up a Zap to send purchase data from Shopify to Facebook
First, go to your Zapier account and create a new Zap searching for Shopify as the trigger app and "Offline Conversions" as the action app.

Next, under the trigger event dropdown, choose "New Paid Order" and click "Continue".

From here, you'll configure the trigger to say Payment Status is "paid", Order Status is "any" and Fulfillment Status is "any". You can change these settings if you want to exclude some orders from being sent as Purchase events based on order status.
(Note, towards the end of this step I'll show you how to do some more filtering to exclude even more orders from sending through this Zap if needed in your specific case.)

Once you've tested this trigger and all is working you can move on to setting up the action step.
For the Action Event, you'll need to choose "Send Offline Event".

Next, you'll need to choose the data source or "event set" that we set up in step 1 to tell Zapier where to send the data. Make sure the event set you choose has a matching ID to the one you copied down earlier.

Then, you'll need to tell Zapier what data to send through by picking the variables as follows (the fields marked with * are very important in helping Facebook match your data to actual users. It's best practice to include as much detail as you can.):
Email*
Phone
First Name*
Last Name*
City
Country
State
Zip*

The following fields are vital to send in order to make sure the event is tracked as a purchase and gives you a true ROAS in the platform:
Event Name: "Purchase"
Value: "Total Price"

Lastly, the remaining field is the most important to send in order to deduplicate these purchase events from already tracked pixel purchase events onsite:
Order ID: "Order Number"

Once this is all set up, make sure to test your Zap then turn it on to enable it. Next, we'll look at how to confirm your Zap is sending events properly.
Step 3: Confirm events are coming into your offline data source
First, go back to events manager and click on the data source you set up in step 1.

You'll see that after about 24-72 hours, events will begin to show up in the "Overview" tab.
It's important to know that your match rates which indicate the number of offline events matched to actual Facebook users, must be high enough to be able to use this data to optimize your ads. If you aren't sending enough events, Facebook will not report a match rate here. Although, there is a way to see an estimated match rate no matter how many events you're sending per day.
Go to the "History" tab and click the drop-down for the first entry:
You'll see under the "Records" column an estimated match rate is reported. This number is not totally accurate but it gives a good indication of the quality of your events. As long as this number is above around 70% you should be in good shape.

From here, we'll take a look in-platform for one of our clients to see just how positive of an impact this has on performance and optimizations on ads.
Step 4: Measure the results and optimize your ads
Over a 7 day time period, our client saw an almost 40% reduction in overall CPA ($166 vs $105) with just over $7k of spend compared to CAPI and modeled conversion data in the "Cost per Result" column in their account. They were even able to see that certain creatives they previously thought were not driving conversion, were actually responsible for a higher percentage of conversions than they originally realized.

One note on measuring performance, if you were only relying on the "Purchases" column prior to enabling this workaround, you should see your offline purchases now totaled in the column with your tracked website purchases. However, in some cases such as our client above, we had to make a custom column called "Total Purchases" and a corresponding "Total CPA" column.
Here's the setup for each of those custom metrics:
Total Purchases = Offline Purchases + Website Purchases
Total CPA = Amount spent / (Offline Purchases + Website Purchases)

A common issue you may encounter:
Oftentimes, there may be a zero-dollar product your store has or maybe even a subscription bundle that gets created as a new order each time. In these cases, Zapier will send 1,000's of tasks which will correspond to an inflated number of purchase events coming through into Facebook.
To fix this, you'll need to add an extra "filter" step into your Zap set up in between the trigger and action steps.
Go to your Zap and click the plus button between the two existing steps. Make sure to select the "Filter" app event on the right.

From here, you can choose a field such as purchase price, or order ID to filter out certain products and orders from sending through as purchase events.

This will fix the over-reporting issue and keep your Facebook Purchase event only sending valid orders.
We are currently testing sending other events with our clients using this method specifically with Add to Carts to see if we can better inform the algorithm to look for users likely to complete bottom-funnel actions. This could potentially be impactful namely for DPA (dynamic product ads) campaigns and when evaluating ad creative performance.
And that's it! If you found this helpful, download our Complete Guide to Beating iOS14/15 & Scaling Your Facebook Ads in 2022. Also, you can reach out to us at any time! We are always able to assist you in getting implementations like this configured properly and managing your ad account to drive performance and revenue for your Shopify store.
If you have any questions, please feel free to leave a comment below. :)